Winter 2025 Ceramics: The Year of Fewer/Better

Last year I shared some thoughts about my seasonal ceramics practice, developed over the past few years by taking an annual wheel-throwing class at the Maine College of Art & Design (MECA&D). I just wrapped up the winter 2025 class and am eager to share what I made, whether I accomplished any of the goals I set out going into this year’s class, and lessons learned along the way.
Here were some of my goals for this year’s class:
Continue refining my throwing technique
Reduction fire pieces
Employ consistent and reliable glazes
Keep playing with tape-resist and carved surface techniques
Pull better mug handles
Be more selective with what I choose to fire
So, how’d I do, you might ask? Well, let me show you…
Quilty Mugs: Variations on a Theme
This year I only produced 11 finished pieces, which is about half the number of pieces I made in 2024 and 2023, respectively. That was partly due to year’s class being a couple of weeks shorter than previous classes, resulting in less class and studio time. But, in truth, I purposely adopted a fewer/better approach to my ceramics practice this year, and I’m so glad I did. Instead of firing more pieces and being experimental with glazes, I focused on throwing better (even if it meant I threw slower), recycling more pieces that I wasn’t pleased with on the wheel (which meant not firing every piece and re-using the clay in a future class), and taking more time to plan and execute surface decoration and glazing. That last lesson was hard to learn—historically, I could not accept how much time it takes to wax bottoms, apply tape resist designs, dip pieces in glaze, wait for them to dry, remove the tape, clean excess glaze off the bottoms of the pieces, etc. That is time-consuming! In any case, I have to say, I am thrilled with the results of these decisions and taking the necessary time to do things better.
Case-in-point, below is a group of 5 “quilty mugs” that I made throughout the class, shown with 3 views of each mug. They’re more teacup-sized than proper coffee mug-sized, but I really like the body shapes, the slightly more refined handles, and the quilt-themed designs I created with washi tape and a single black glaze. I focused on one type of quilt block per mug: Ohio Star, Improv Stripes, Flying Geese, Nine Patch, and Bear’s Paw. How cute are they?! Even though the shapes and handles aren’t uniform—nor were they intended to be—they appear as a pseudo-set due to the consistent design and glazing.


Turning a mistake into something playful and refined.

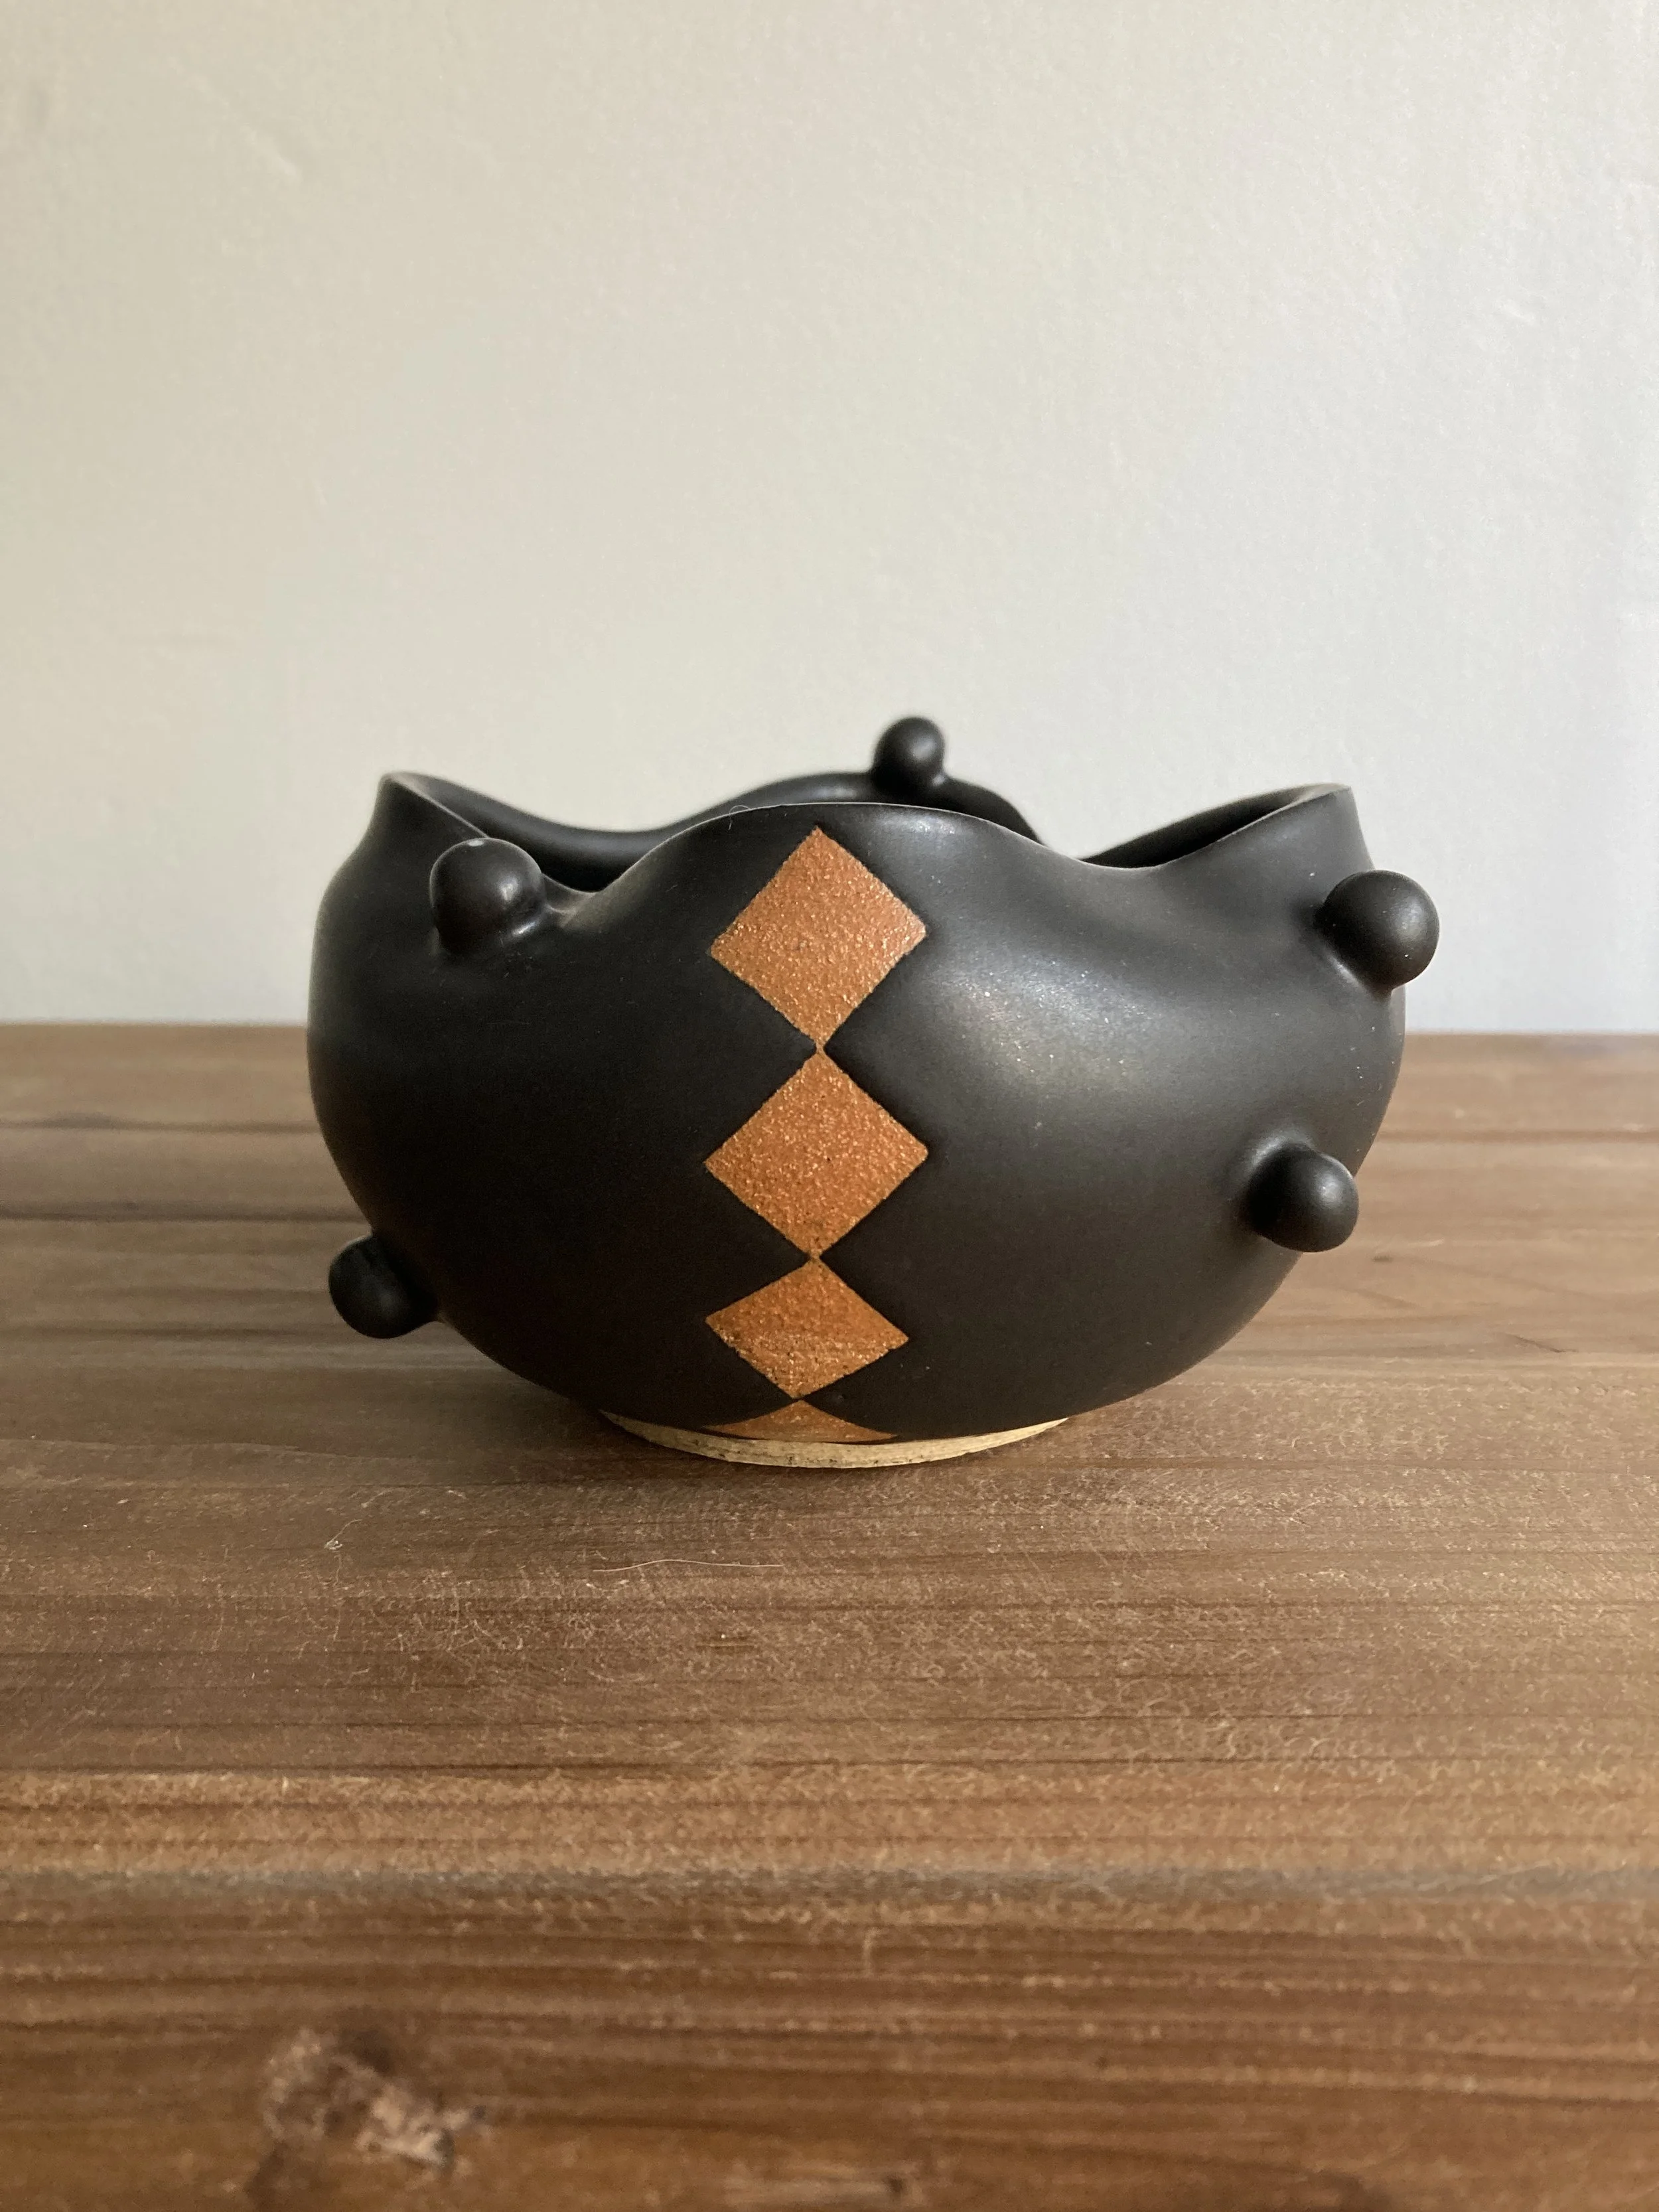


This whimsical little guy started out as a botched throwing mistake on the wheel, which I decided to morph into a playful display piece. The first step was tugging the thick-and-thin rim to make the opening a wonky shape right after it came off the wheel (you can see this most clearly in the image from above). During the trimming phase, I decided to add some bobbles—I’m borrowing a knitting term here—to the surface. I was thinking of these little guys climbing/rolling around the piece. My favorite moments of this are the one on the very edge of the rim (most clear in the left image) and the single bobble that looks like it has fallen inside the vessel. Lastly, during the glazing phase I leaned into a pseudo-harelquin look with some tape-resist diamonds and an all-over black glaze. This piece has turned out to be one of my favorite ceramic objects I’ve ever made, and it’s amazing to think it started out as a badly thrown mistake!
Glaze Notes

Here are all my Alfred Black pieces—all the mugs, my whimsical bobble piece, and a sub-par little bowl which is very unexciting, but is fairly fit for purpose, as they say on The Great Pottery Throw Down. What can I say, I’m a big fan of black, graphic pieces!

While most of the pieces I made this year were glazed with the ol’ trustworthy Alfred Black glaze, I also dabbled a bit with a lighter glaze that I have used before: Honey Purple (strangely named since it doesn’t fire purple at all). Funnily enough, even though I think of this glaze as reliable, the mix was slightly different than the Honey Purple I used last year, so yielded different results. This year’s version was a little thicker, more white in appearance, and trended a little gloopy/runny when fired, but nowhere near as runny and unpredictable as some other glaze combinations I’ve used before. Still a favorite!
Assessing My Goals
So, to return back to my list of goals for this year’s class, here are some closing thoughts:
Continue refining my throwing technique - Check! There’s always room for improvement, but I am pleased to see steady progress in my throwing year after year.
Reduction fire pieces - Nope! For a number of reasons, there weren’t many reduction firings on the schedule so I focused on oxidation firing instead. In the end, my pieces turned out pretty toasty looking; not too dissimilar than the dark bare clay I saw in my reduction-fired pieces last year.
Employ consistent and reliable glazes - Definitely! As you can see above, I stuck with only two glazes that I feel pretty comfortable using: Alfred Black and Honey Purple. I really like that these glazes lean matte in appearance and generally don’t run too much, making them suitable for the tape-resist technique I’ve been employing.
Keep playing with tape-resist and carved surface techniques - Yes to tape resist, no to carved surfaces. And that’s OK! I decided to focus almost exclusively on the tape resist decoration, and I’m pleased I did.
Pull better mug handles - Generally, yes! Again, there’s room to improve in the future but I am getting better at pulling more delicate handles with decent shapes.
Be more selective with what I choose to fire - Most definitely! This was a huge game changer for me, even if it felt kinda “meh” that, in a 3-hour class period, sometimes I would have thrown 1 or 2 halfway decent shapes that I felt comfortable firing.
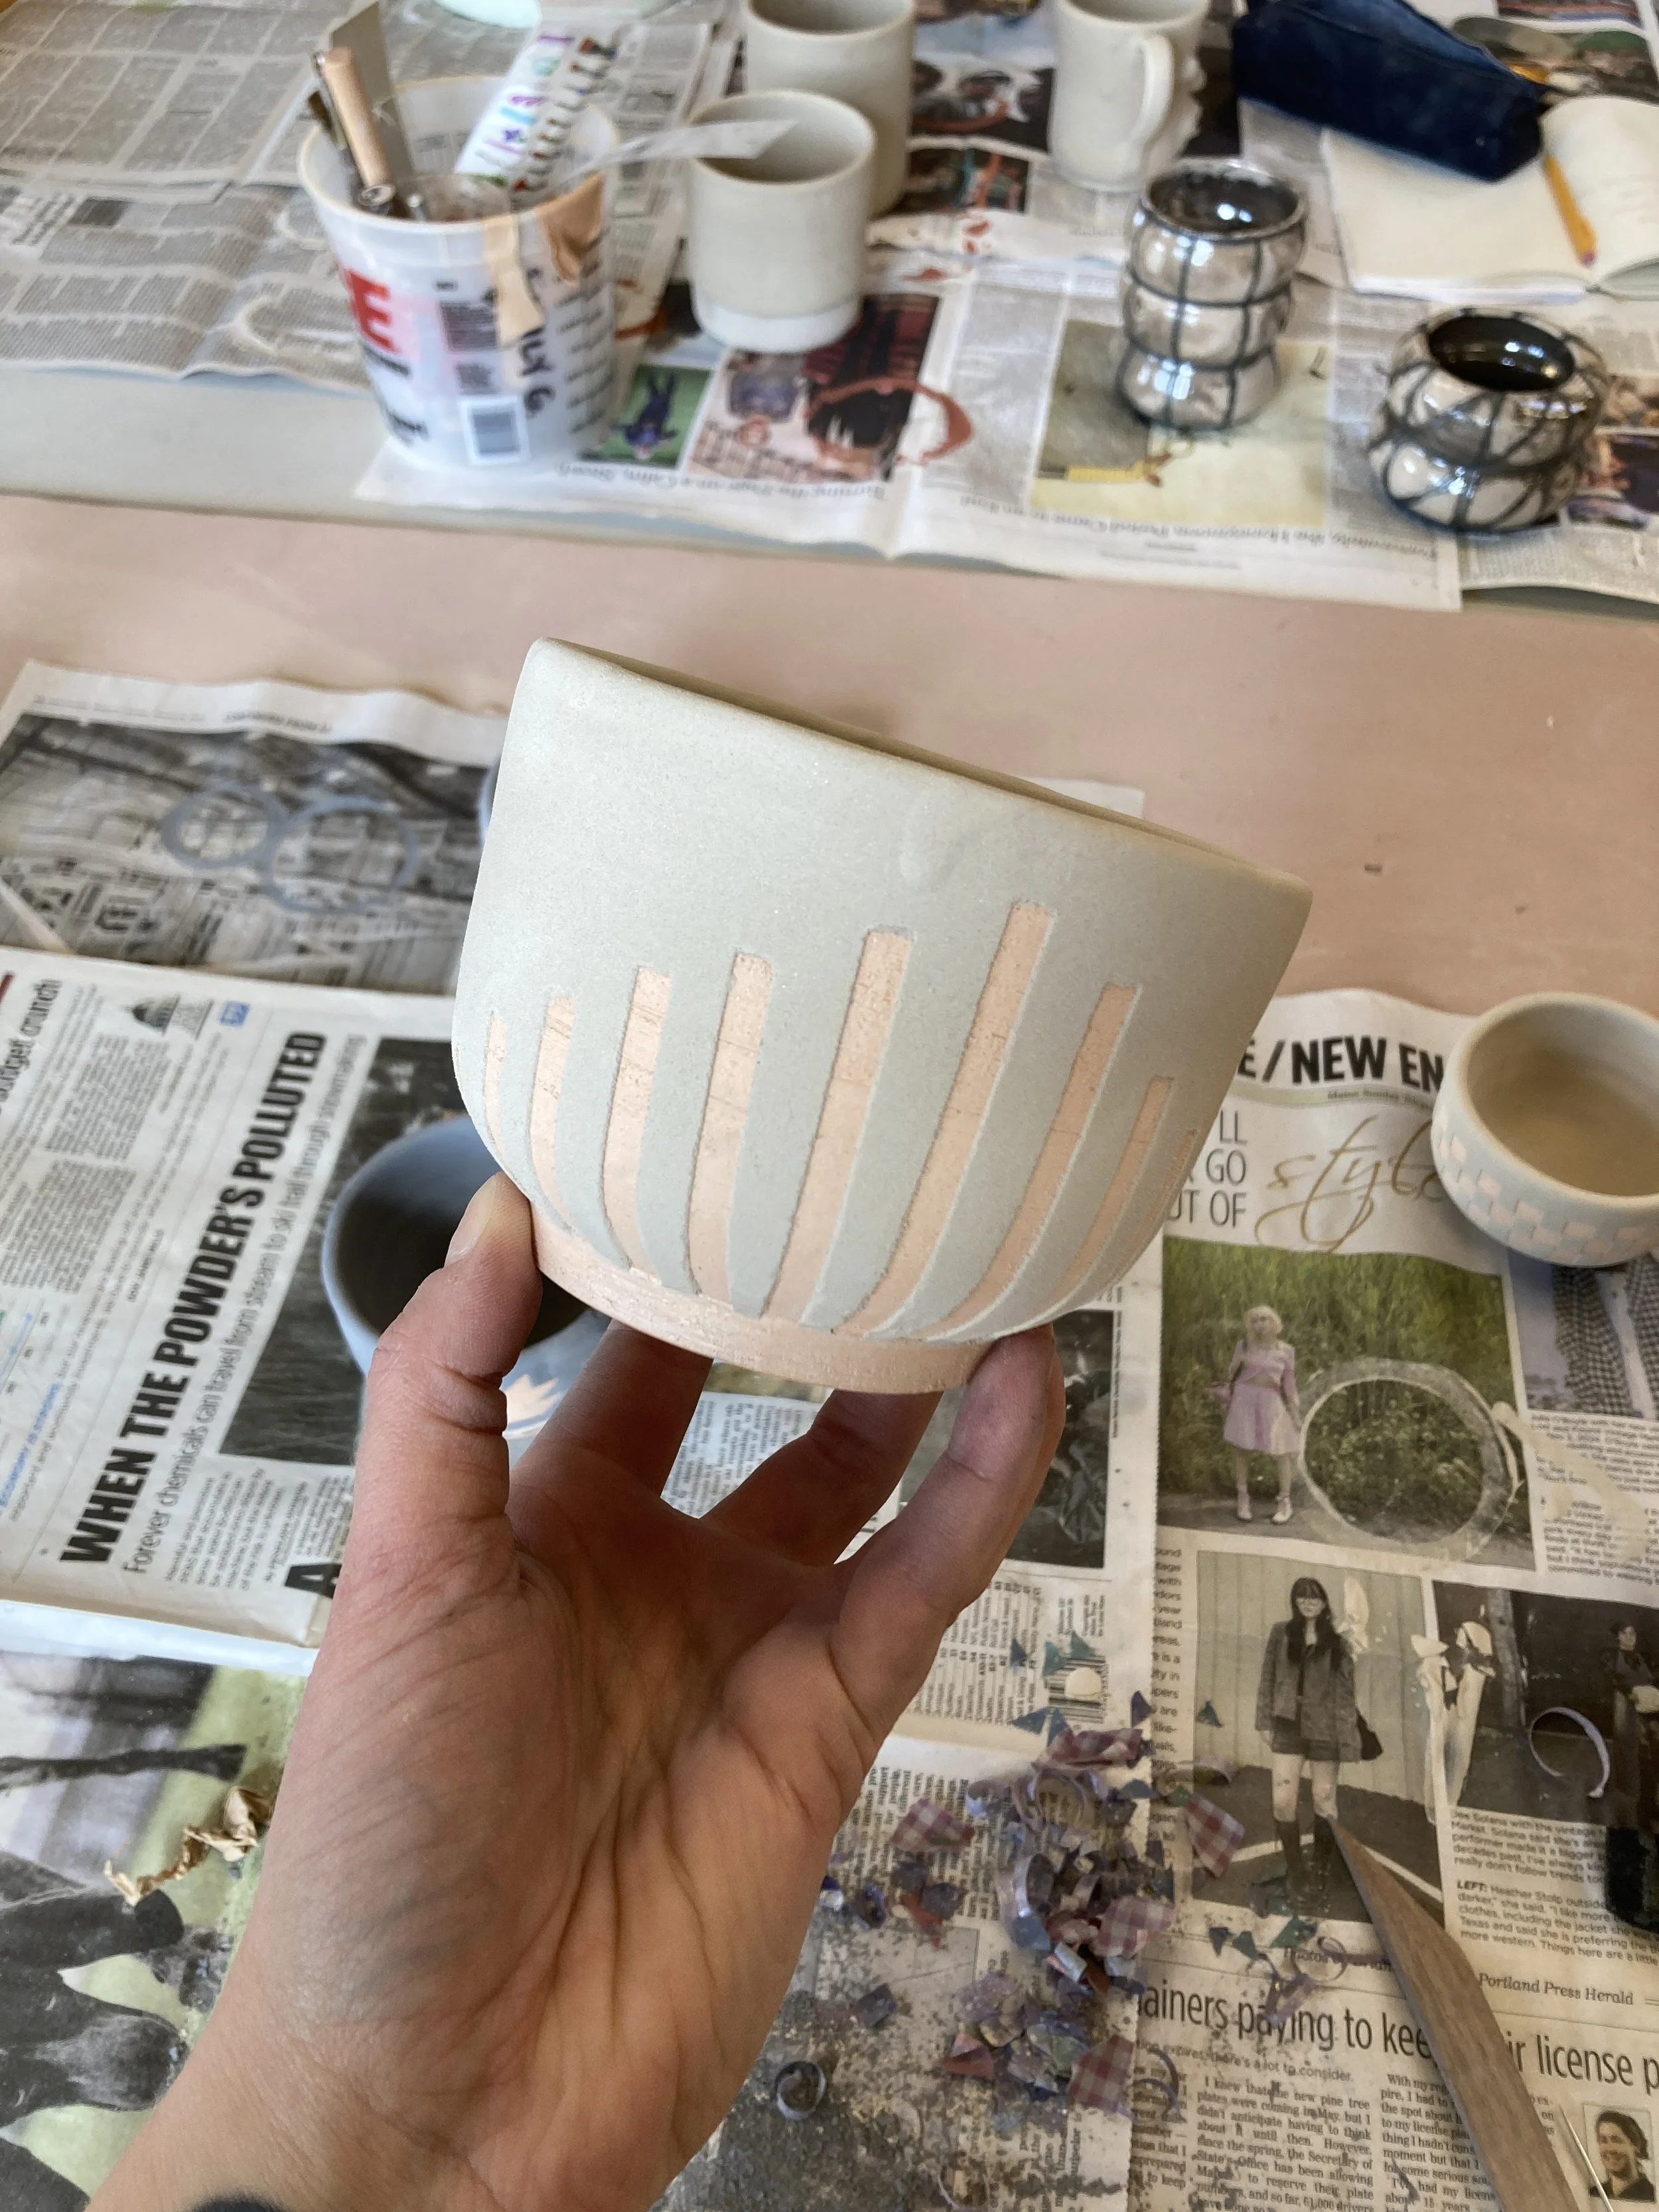
Process Shots


That’s all for this year!
Thanks for following along on my seasonal ceramics journey!